Part 111: Episode CV: The Final Ring

Episode CV: The Final Ring
.jpg)
The Immortal Mountain, as Mount Fuji refers to itself on dating sites, has now appeared as our next destination on the
.jpg)
So let's tackle one of the least involving ones -- the Treasure Hunt. Since we picked up that hidden Blood Jewel from the Forest of Wind crossroads, we can now return to Yokohama Streets and

Music: Rising Sun ~ Japanese Town
.jpg)
 Oh, yes! It's your treasure, my friend!
 Dammit! You're really starting to bug me! How do you find it so fast?! Eh... It's been a few months since I've been back in these parts. But, a
  pops out of my head when there is a point of interest. So that helps a heck of a lot. So? You want another beating? You think I'll just give up?! No way! I'll take you on! Here it is, my final challenge! This time, I'm serious!
.jpg)
.jpg)
...I didn't even need to look up where this was to figure it out. You're slipping, Croft.
.jpg) You bet! Although it's only because I've run out of treasure to hide! But this last code is extra difficult! This time, you can't possibly beat me! See! The code's almost impossible! It's gonna really annoy you, and you still won't find the treasure! ...... Is this old man Kawashima's house back in the Imperial Capital? N-No...!
You bet! Although it's only because I've run out of treasure to hide! But this last code is extra difficult! This time, you can't possibly beat me! See! The code's almost impossible! It's gonna really annoy you, and you still won't find the treasure! ...... Is this old man Kawashima's house back in the Imperial Capital? N-No...!.jpg)
.jpg)
It is, in fact, located behind a rock in Mukyo-An. Naniwa must have been very confused why some weird white guy hid a dog bone under a rock in his backyard.
.jpg)
The Dog Bone is the first of our penultimate weapon upgrades for our party. This one is a Rasp for Blanca. Just gnawing on the bone of a dog is far stronger than rare specialized toothpaste made for a lion's maw. This gives +185 Physical and +186 Special Attack.
.jpg)
Let's fly back to Yokohama and tell Croft to suck it. Or we would... except, Croft took his ball and went home as we discover when we return... There is now a random child hanging out near where he was stationed.
.jpg)
 He was shouting something about going to look for treasure to hide. What a weirdo!
And that concludes the Treasure Hunt sidequest. Croft died on the way back to his home planet. The end.
.jpg)
So that is one side quest down! Only... three dozen more to go! But, everything else is well out of our way at the moment or won't trigger until the next big plot event. So we're just going to focus on the critical path and hit up the next area. Time to go to Mt. Fuji!
Music: In Darkness of a Labyrinth ~ Dungeon
.jpg)
.jpg)
I fucking HATE this dungeon! This is the worst dungeon in the game. By far. Hands down. This is a trash-tier dungeon! Even among the previous identical 3-4 shitty subterranean dungeons, this is next-level crap. I hope you enjoy looking at gray-blue rocks. As that is the next 90 minutes of this game before we get to the boss. Precisely, 93 minutes to get to the boss if my footage time is to be believed and I had a guide the entire time telling me the optimal path.
Oh, and of course it's not helped by a high random encounter rate...
.jpg)
Music: Deep in Coma ~ Battle in Japan
.jpg)
We've got a decent pool of enemies to contend with in this dungeon. The most common is probably the Samurai Ghoul (Or Hone-musha/Bone Warrior in Japanese) which is... just an undead skeleton samurai instead of the base zombie samurai we previously faced. These are Earth elemental creatures with 321 HP. They hit fairly hard with physical attacks and can inflict Physical Defense debuffs with their sword strikes and... that's kind of it.
.jpg)
Next up we have a Lava Lump. It's a dude stuck in a lump of lava. The name is apt. He doesn't appear to be having a great time. Unsurprisingly, it's a Fire elemental monster with 291 HP. It can headbutt with its lava mass to inflict Physical Attack down and fling out Red Cradle fire magic.
.jpg)
Filling out the roster and often appearing in hordes of 4-9 in an encounter, we have the Blooming Phoenix which is just a harpy with big boobs and a huge butt. It's not nearly as alluring as its reindeer-headed cousins back in Russia. It's a Wind elemental, what with the wings and all, with 206 HP. It can inflict Fake Ring and likes to cast Arc Gale to speed up its allies. They're easily the weakest enemies in the monster mash of this dungeon and often group together for easy AOE magic takedowns of several at a time. The Japanese name for it is Fenghuang Chick which is just the Chinese version of the Phoenix legend.
.jpg)
Finally, there is just a huge ass scorpion called Scorpilus. I hate it because it reminded me of Resident Evil 0 and I don't want to be reminded about Rebecca Chambers and Billy Coen's big dumb adventure with leeches and villainous opera singers. These are the hardiest enemies in Immortal Mountain with 880 HP and they're Light elemental because... I don't know scorpion mechanics. I've got nothing. Does Japan even have scorpions? I mean, other than the undead ninja from Mortal Kombat. These are I believe the first enemy we've encountered that can inflict Deadly Poison by default which is Poison 2 -- the sequel to Poison and knocks off over a quarter of an inflicted character's health per turn. It's a bad scene. Kill these guys with haste before they get a chance to use that.
Music: In Darkness of a Labyrinth ~ Dungeon
.jpg)
Back to the dungeon proper. We've done a handful of crummy cavern/underground/sewer dungeons now. What makes this one especially suck? Let's check out this altar up ahead.
.jpg)
 It looks like some kind of altar.
Yeah, if only it was just an altar.
.jpg)
.jpg)
To the east of this altar, we find another Crest. We do need to collect 'em all.
.jpg)
.jpg)
And to the west of the altar, we find a chest containing a Red Crystal. Well, we did just find a strange altar. Perhaps we should investigate further and perhaps use this ornate crystal.
.jpg) Okay, let's try it.
Okay, let's try it..jpg)
.jpg)
.jpg)
 We got transported! I guess that must've been a warping device.
 A warping device, huh...? I never imagined there'd be a device like that inside the Immortal Mountain... Is it a device or a magic thingie? It feels like a magic thingie. A magical device is still a device. ...I guess so. Feels wrong, though. Anyway, whatever, let's keep going.
.jpg)
So this isn't just an aesthetically dull as dishwater cavern dungeon.
.jpg)
This is an aesthetically dull as dishwater cavern dungeon warp maze! EVERYONE'S favorite gimmick!
.jpg)
.jpg)
And it's not just a warp maze dungeon. It's a warp maze dungeon with multiple portal triggers we can need to shuffle between in order to teleport to different parts of it. Sometimes in specific sequences!
.jpg)
.jpg)
And no we're not getting any map or indication of where we ended up because every area looks like an identical stone corridor with little to no landmarks. Hell, half the treasure in this level is hidden hotspots in corners of the map so we don't even get open chests as landmarks to indicate areas we've already explored. What the hell, Shadow Hearts: Covenant? You had a crappy teleporter maze in the Temple Ruins in the first game and at least that one was kind enough to leave a ton of treasure chests to mark explored locations. This shit is just rude as all get out.
.jpg)
.jpg)
.jpg)
There are three of these goddamn crystals we need to insert into roughly a dozen different altars across the area. All leading to different maps depending on the color of the crystal utilized. This was a treat to play with no guide my first through the game, let me tell you.
.jpg)
The best part is there are multiple unique items and side quest progression points down specific paths. Oh and there are just dead-end paths too with items that are hidden from view and you just need to hump the walls like the Doom Guy in the original game in hope of picking up some nothing consumable item not remotely worth the time fighting two random battles to obtain. Oh, and some teleporters lead to different parts of the same map and you just waste your time as the altars we place the crystals on and the teleportation destination are mutually exclusive. We can't warp to an area and take our colored JO crystal back. We've got to get it specifically from the altar it came from. It's great!
.jpg)
Lucia's penultimate weapon is hidden behind this altar path and it is ACTUALLY hidden from view behind the scenery. I hear there are a lot of Hades fans out there. I still need to play that for more than half an hour. I hear it's pretty good. Unlike Lucia in battle. This item grants +176 Physical and +196 Special Attack Power.
.jpg)
.jpg)
I'm not going to over how specifically to get through all the points of interest in this dungeon because it's shit like "Take the Yellow Crystal out and place it by the first altar in the room NOT the one right past it near a save point and then backtrack to obtain the Blue Crystal and bring that to the Yellow Crystal warp point and then go through a roundabout and use the altar there, NOT the one you see earlier down the path to get to..."
.jpg)
We're just going over the highlights. Like a goddamn Wolf Bout is hidden behind a specific series of portals. One that looks suspiciously similar to Blanca, no less...
.jpg)
Blanca is going to need a Leonardo's Bear for this match since Instant Death will be in play and be a bad scene for him otherwise.
Music: Soul Comet ~ Spirit of the Wolf
.jpg)
 Awroo... (Nobody wants to bother with that warp maze rubbish.)
 Aw-awroo?! (I'm getting a weird sense of pressure in my chest... Hey, who are you?!) Awroo... Awroo. (My name is Lobo. They used to call me the "King of the Wolves.") Awroo... Grrr. (Lobo, eh? So you're him. I've got a question for you.) Awroo, awroo. (A wolf answers to no one. Only strength will make a wolf submit.) Awroo? (Then why did you answer the question about your name?) Awroo Aw...roo. Awroo! (That was... just common courtesy. This is a test of mettle!) Awroo... Awroo. (Do you really think you have that kind of strength?) I do! And don't forget it!
.jpg) Remember those words. And now get ready for defeat!
Remember those words. And now get ready for defeat!.jpg)
Music: Glint of Light ~ War of the Hungry Wolf
.jpg)
Time to take on
I'm just remembering the Final Fantasy IX Official Guide now. Read more at Playonline.com!
.jpg)
.jpg)
Since Lobo's intent was to KO Blanca in a single blow, his attack power is actually quite weak otherwise. To the point, the Shield spell will allow him to do MAYBE 2 HP of damage if he lands a critical hit.
.jpg)
.jpg)
I'm guessing that "King of the Wolves" is a former title and not a currently held honor, eh?
Music: Result ~ Victory
.jpg)
.jpg)
And that's another Wolf Bout in the bag. I wonder if Blanca is going to ace this wolf off-screen as well. Though, that may be rather inappropriate considering, well...
Music: In Darkness of a Labyrinth ~ Dungeon
.jpg) It's the job of the young to carve out the future. Old men should stand aside.
It's the job of the young to carve out the future. Old men should stand aside..jpg) Awroo... Awroo? (So it's true, then? ...But why?! You were in no shape to fight...!) Awroo... Awroo... (A warrior never stops fighting. But my own son wasn't cut out for battle...) <looks into the air> Awoo... Awrro. (He left home, and I hear he lived out his days in a peaceful forest.) Awroo... Awroo. (He said something about wanting to be a park ranger... I told him I didn't think they allowed wolves to become park rangers.) ...... Awroo... (He told me there was nothing in the rule book that said a wolf can't range parks...) ...Awroo. (...Perhaps there was a rule against that.) *whimper* (But now I see his son chose the path of the warrior...) <sits down> ...... Awroo... Awroo. (I don't have any more time left... Blanca, ask Ernest everything...)
Awroo... Awroo? (So it's true, then? ...But why?! You were in no shape to fight...!) Awroo... Awroo... (A warrior never stops fighting. But my own son wasn't cut out for battle...) <looks into the air> Awoo... Awrro. (He left home, and I hear he lived out his days in a peaceful forest.) Awroo... Awroo. (He said something about wanting to be a park ranger... I told him I didn't think they allowed wolves to become park rangers.) ...... Awroo... (He told me there was nothing in the rule book that said a wolf can't range parks...) ...Awroo. (...Perhaps there was a rule against that.) *whimper* (But now I see his son chose the path of the warrior...) <sits down> ...... Awroo... Awroo. (I don't have any more time left... Blanca, ask Ernest everything...).jpg)
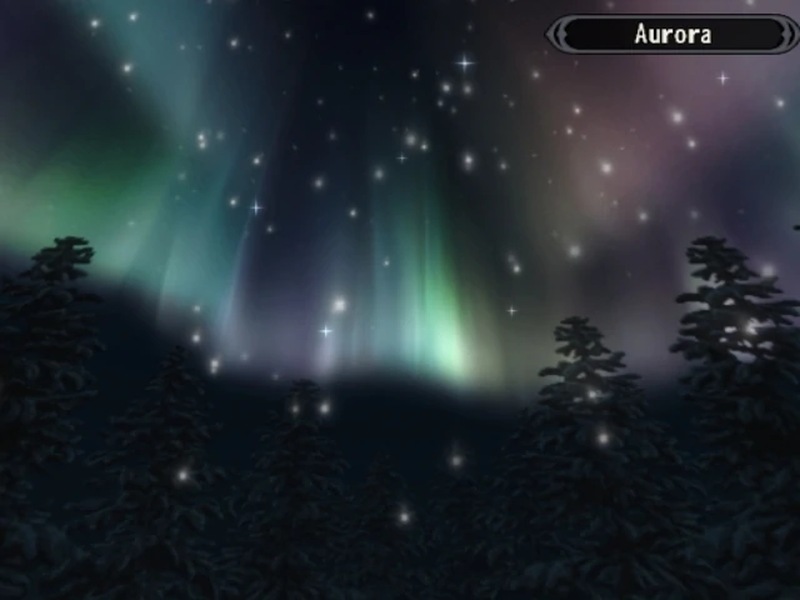
Blanca defeating his grandfather grants his final Manifestation -- Aurora which fully heals the entire party in exchange for 54 MP. That's right, Blanca can manifest the Aurora Borealis at this time of year, at this time of day, in this part of the country, localized entirely in the back of a teleporter maze inside Mt. Fuji.
Beyond that, we can take a look at Lobo's Profile.
.jpg)
King of the Wolves.
Trapped and starved
to death by humans.
Although over 100 years
old (in dog years), he
has the heart of a
young warrior.
So Lobo is ANOTHER undead wolf? Or is he a ghost wolf? What's going on here? In either case, he's certainly looking in better shape than the last undead wolf we encountered.
Lobo lays down and goes to sleep.
.jpg)
Well, we have completely filled out the Wolf Bout tally sheet with twelve qualifying Wolf Bout paw prints. We should return to Ernest to claim our prize. You know, next time we're in France. It is worth a mention that the first story in Ernest Thompson Seton's Wild Animals I Have Known book is "Lobo the King of Currumpaw." So actually fighting a Lobo to conclude the Wolf Bouts is a good reference. Though, does that make Blanca the heir to the Currumpaw throne? ...Where the hell is Currumpaw?
.jpg)
There is one more major point of interest across several other warp zones and shuffling of crystals on altars. And it's really screwed up it is an easily missed event. If we go to this random dead end of a cave that looks identical to at least ten other dead ends in this cave, we find an old pal.
.jpg)
 What's up with you? Nothing, I'm fine. Stuck going through a warp maze. It's kinda tedious. I really need to learn how to teleport one of these days. You should! It really comes in handy! I'm glad I took those courses back in college to learn it. It saves a ton of cash on commuting. Especially, when you're the Ring Soul. But, about that... Eh? Today's the last time, you know. The last time I do this. I've had a lot to deal with recently. But I couldn't have gone on with this Ring Soul job without you. Me? Yeah. At first, I thought I just needed to get the job done and go. I was supposed to be contacting Karin for this job originally, you know. They told me she was the protagonist. I mean she's on the game cover boxart. But then you showed up and became the lead protagonist and Karin stopped talking to me. You do get awfully quiet during these chats, huh?
 You seem to have it handled. I wasn't sure what to think. But then, we had some disagreements, we talked... We sure did, huh? ...And then we were friends! I think that's pretty cool. <rubs his neck> Haha! Hey, you're embarrassing me, here. So, here you are. This is for you. With my thanks.
.jpg)
And that is indeed the last Attack Boost in the game. Everyone can achieve their maximum physical attack string at this point.
.jpg) Good luck, okay? Listen, let's go get a drink once I'm done! We could go down to Micha. There are some good bars down there. Sure, you got it! Great! I'm looking forward to it! I'll see you off today, okay? See ya, then!
Good luck, okay? Listen, let's go get a drink once I'm done! We could go down to Micha. There are some good bars down there. Sure, you got it! Great! I'm looking forward to it! I'll see you off today, okay? See ya, then!.jpg)
Ring Soul does not vanish this time. He waits for Yuri to leave because he is a good extra-dimensional entity. That is unfortunately the end of the Ring Soul questline. Ring Soul does make an appearance in Shadow Hearts: From the New World. Though you mostly find yourself dealing with his daughter, Aya. But that's an adventure you're going to have to take on your own, kiddos!
.jpg)
.jpg)
There is quite a bit of loot among the assorted teleportation zones but it's all crap we've seen already. I got it all, don't worry! That was just an hour of my limited time in this world down the drain looking at gray walls and fighting the same four guys in various configurations. But, eventually, we make it to an ORANGE cavern. Progress! And no more teleporting, thankfully. There are a few branching paths with loot at the ends. But again, they're nothing worth mentioning.
.jpg)
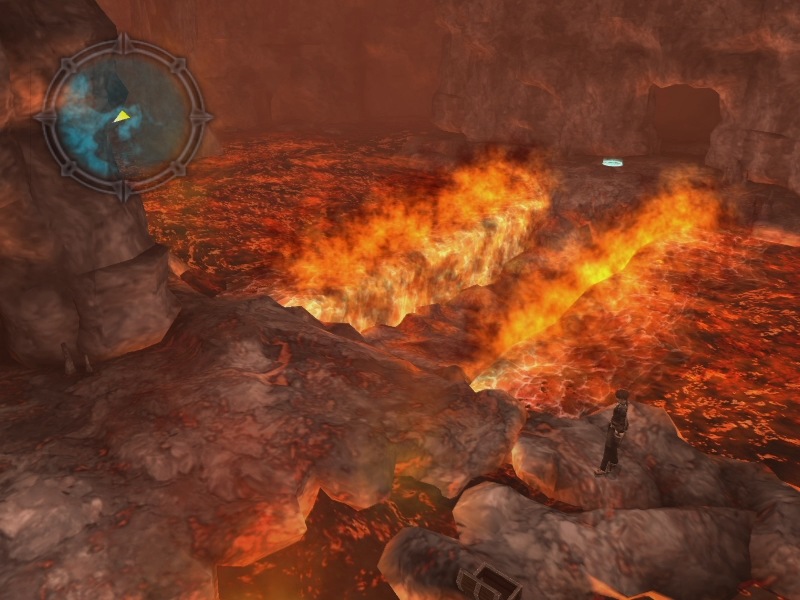
Heading straight ahead will take us to the lava river that Kato and the Mutant Apes were hanging out around. Before we rush forward, there is a very sneaky treasure chest that is easy to miss. Can YOU spot it?
.jpg)
This dungeon is just rude.
.jpg)
This is Kurando's penultimate weapon. I'm doubting the vigilance of its millennium watch over Japan when it's just sitting in a crate in the back of a volcano. But it does provide Kurando with +206 Physical and +166 Special Attack Power.
.jpg)
.jpg)
There is nothing in the way of gimmicks for the rest of the dungeon. It's just a straight linear shot to the end. Even the random battles have been disabled. I don't think they wanted to design a lava river random battle zone map that is used for all of three rooms you can jog through in a minute.
.jpg) I wonder where they all went?
I wonder where they all went?The ground shakes and the bridge across the lava river that Kato and his crew encountered reappears.
.jpg)
That does appear to be the case. Tune in next time when uhh... let's just say some major shit goes down in the heart of the Immortal Mountain.


Video: Lobo Wolf Bout


Samurai Ghoul Concept Art - Human skin slacks probably itch something fierce.

Immortal Mountain Concept Art - It's quite convenient that all active volcanoes have naturally occurring bridges over deadly lava rivers.